Every project decides which details its tasks have. A trip like California might need a date, a place and a booking link. A shopping list might need nothing but a title. Start small and add a field when you miss it.
Add a field
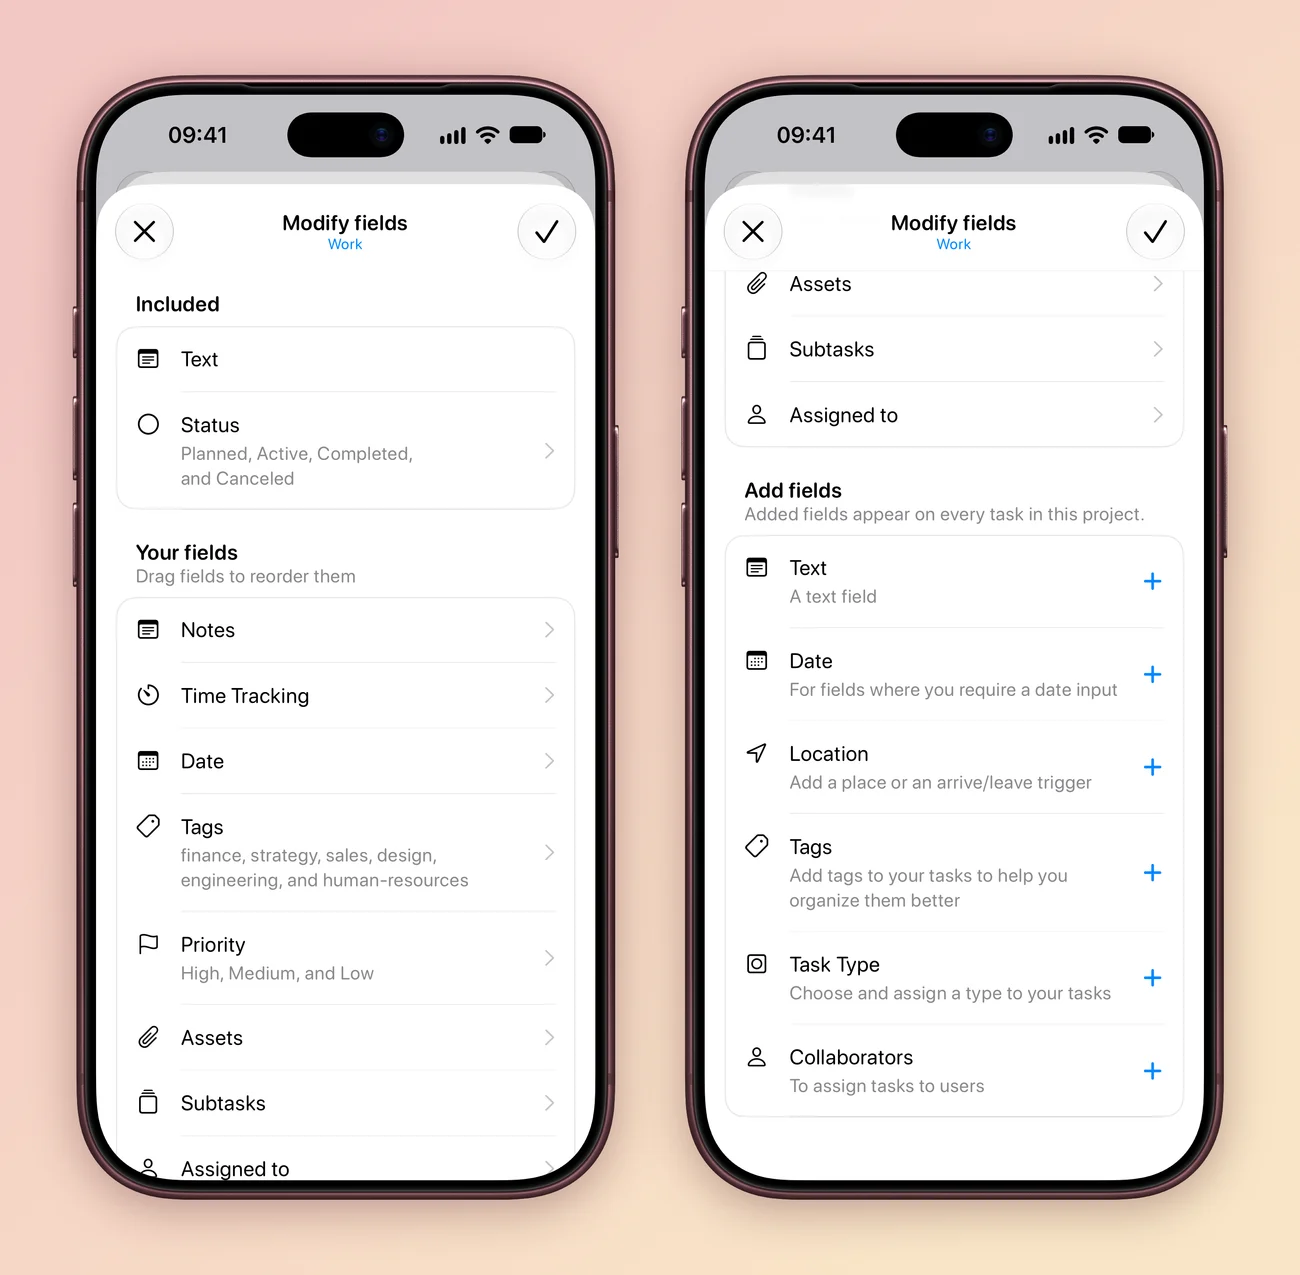
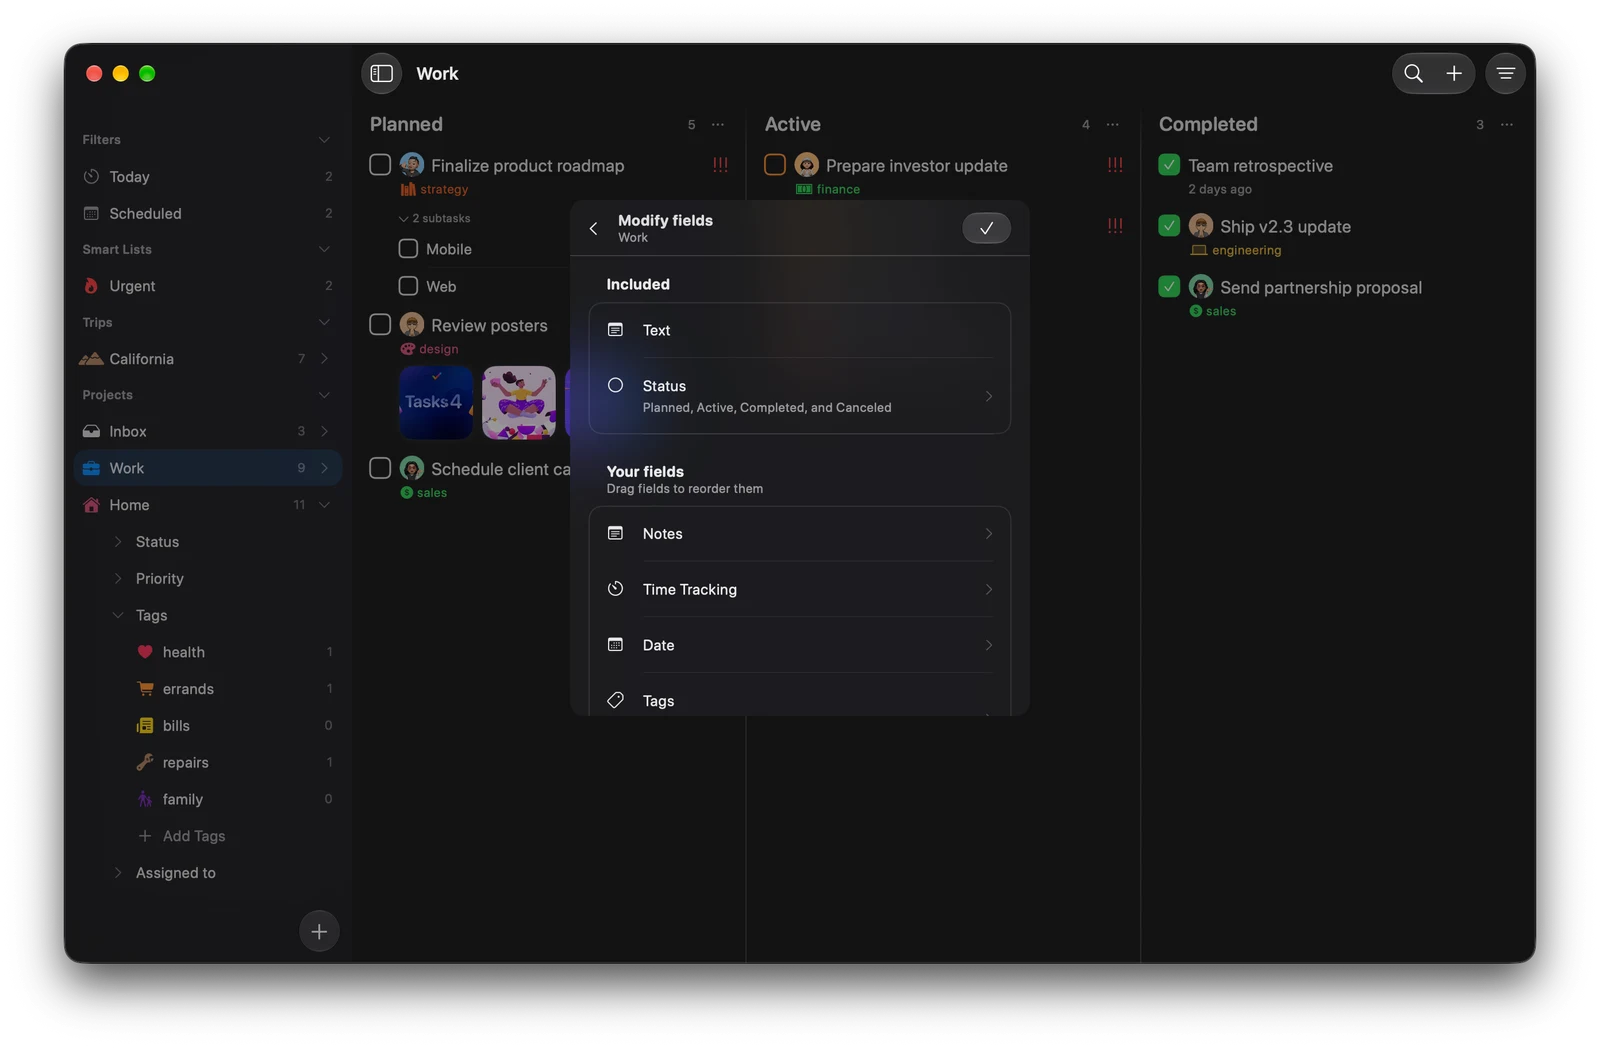
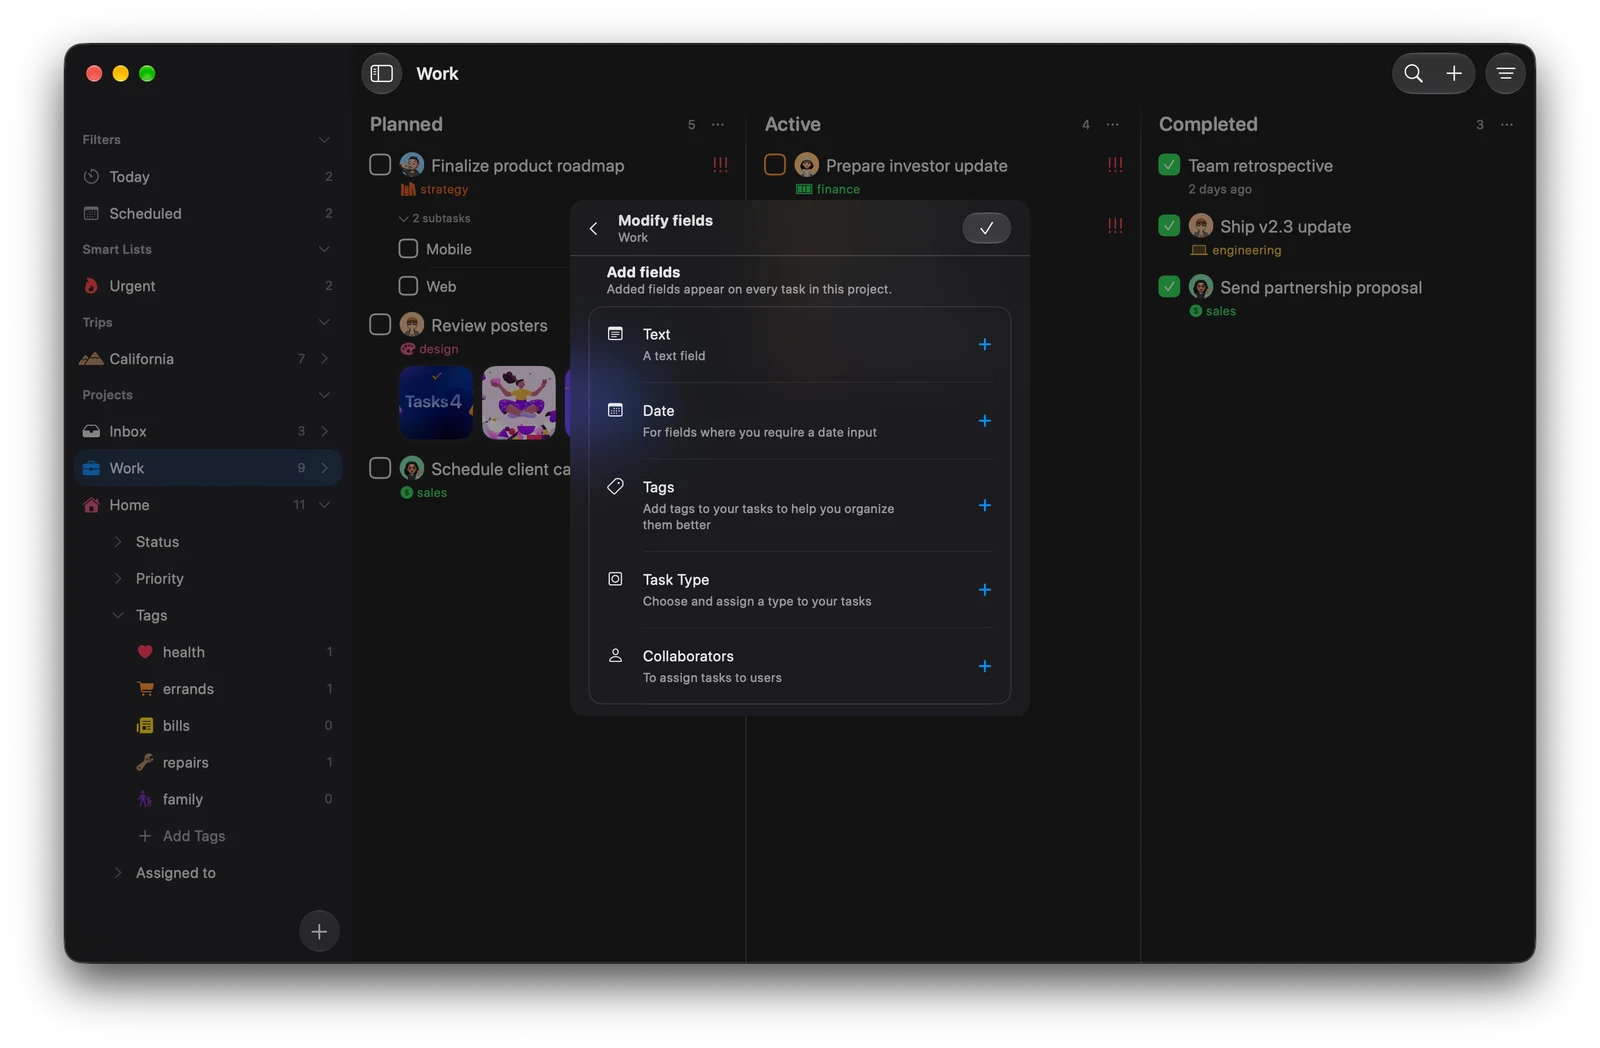
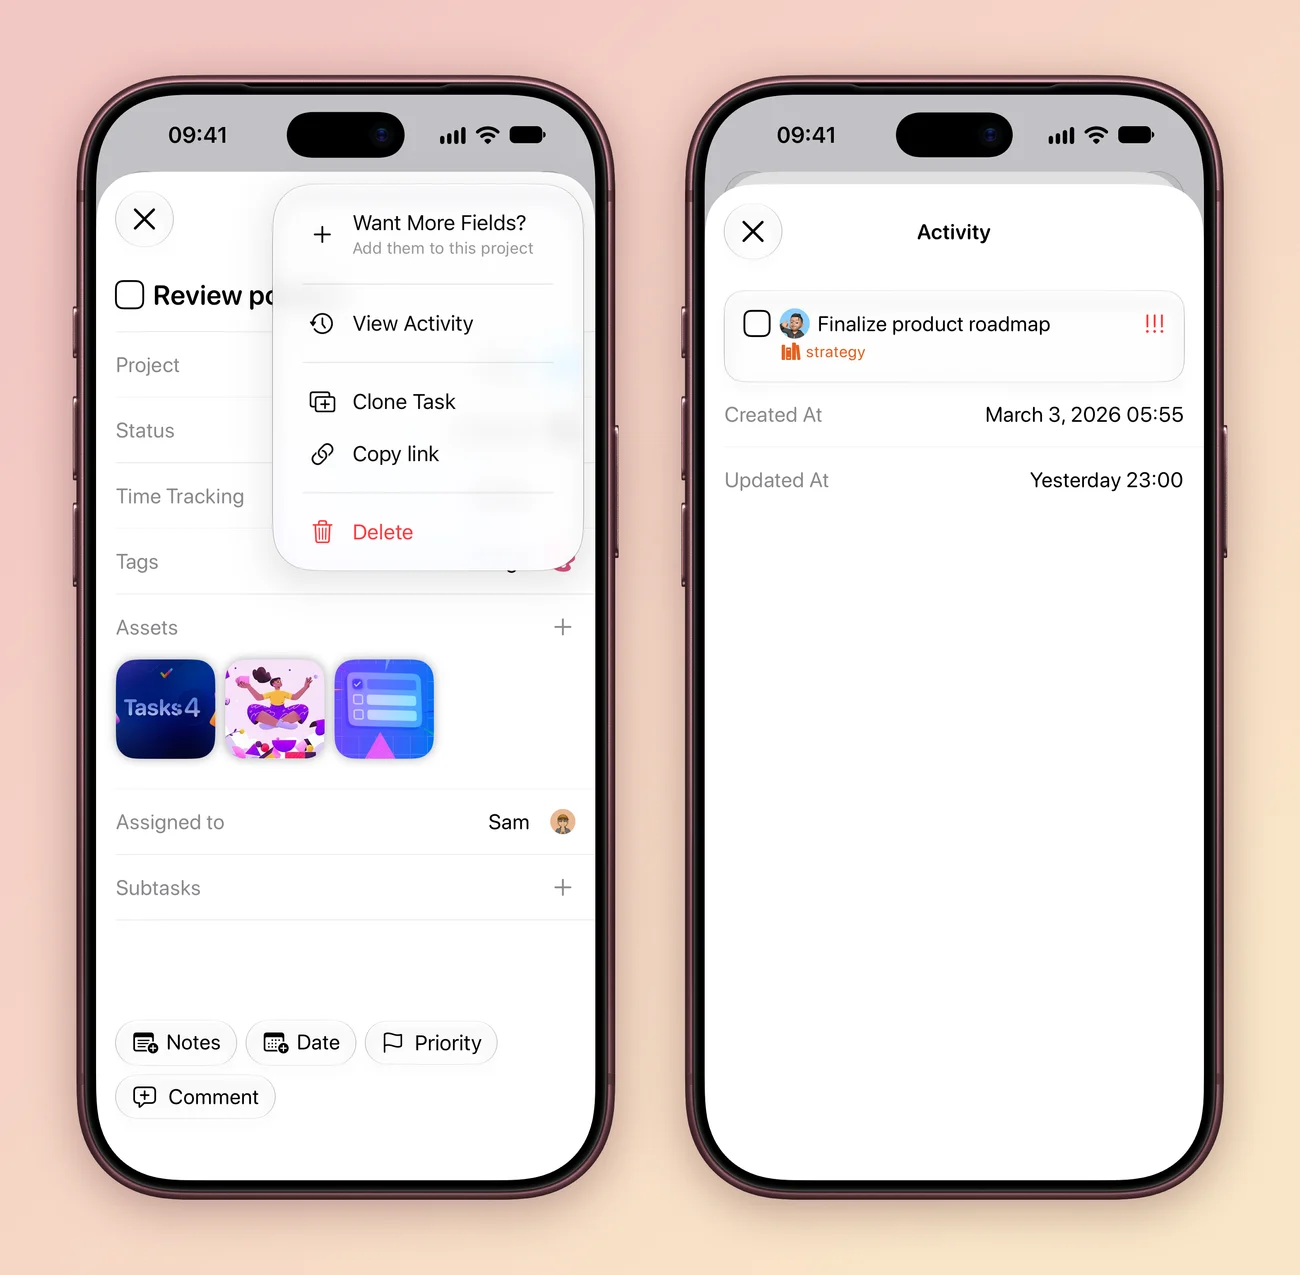
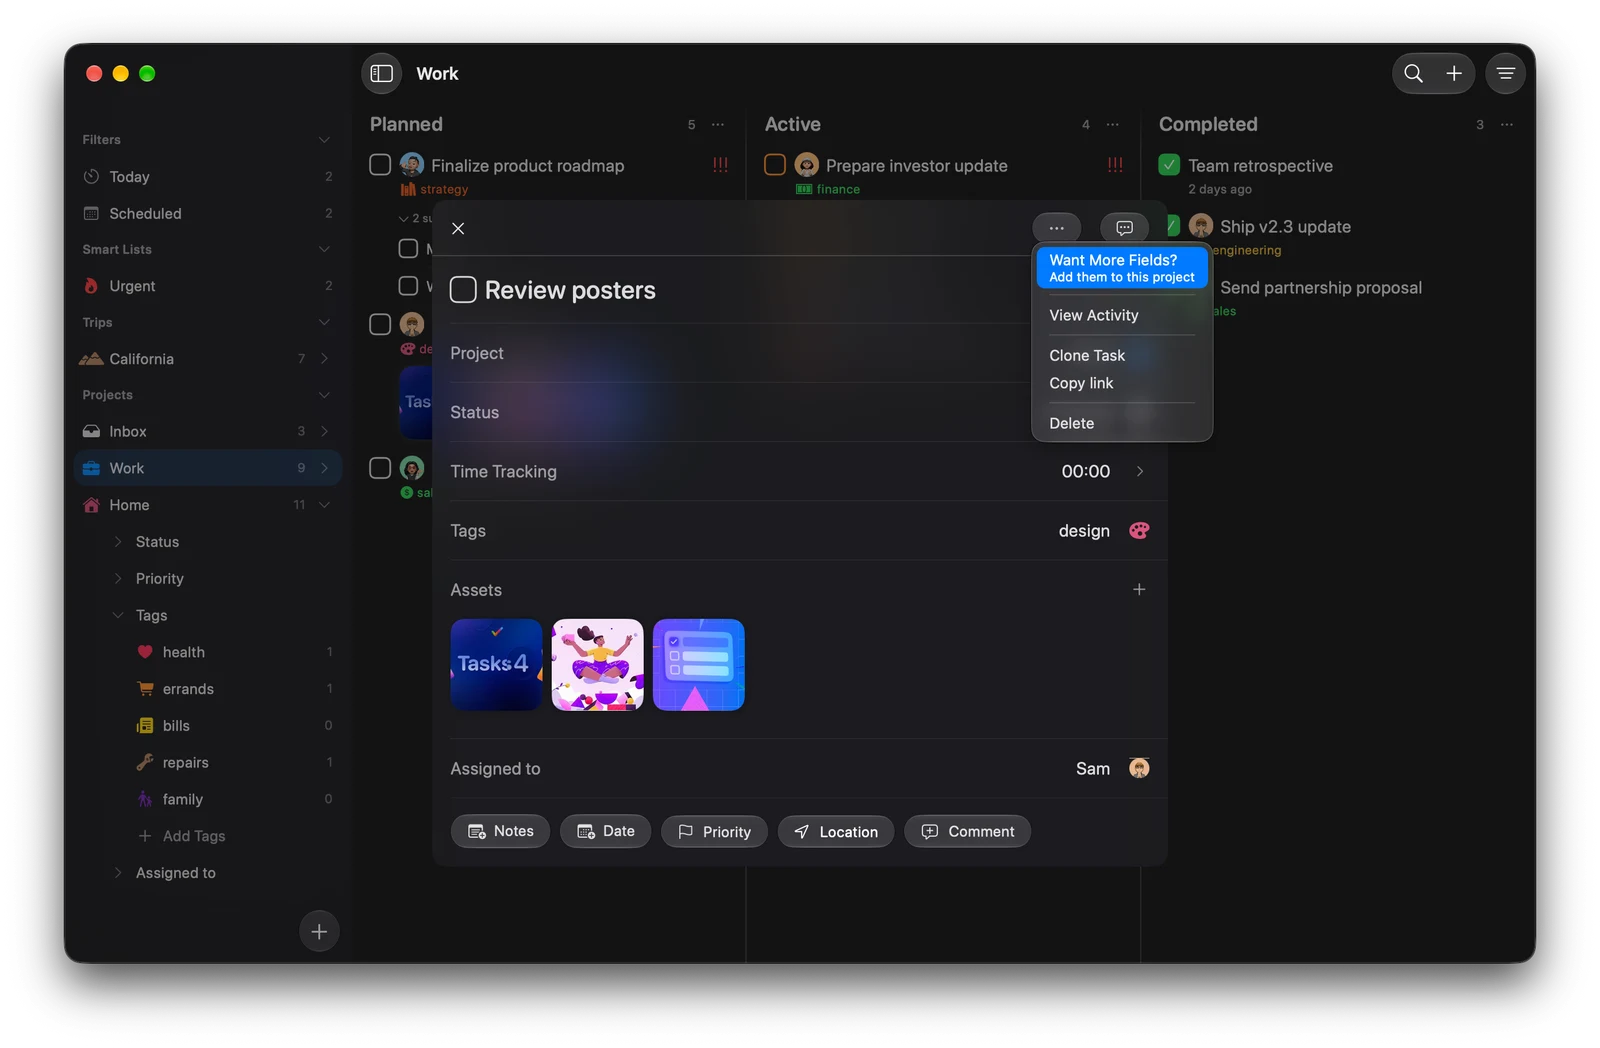
- Open the project menu and choose Edit, then Fields. From inside a task, open the … menu and choose Want More Fields?
- Look through Add fields and tap + next to the one you want, such as Date or Location.
- Drag Your fields into the order you like, then tap the checkmark. Added fields appear on every task in the project.
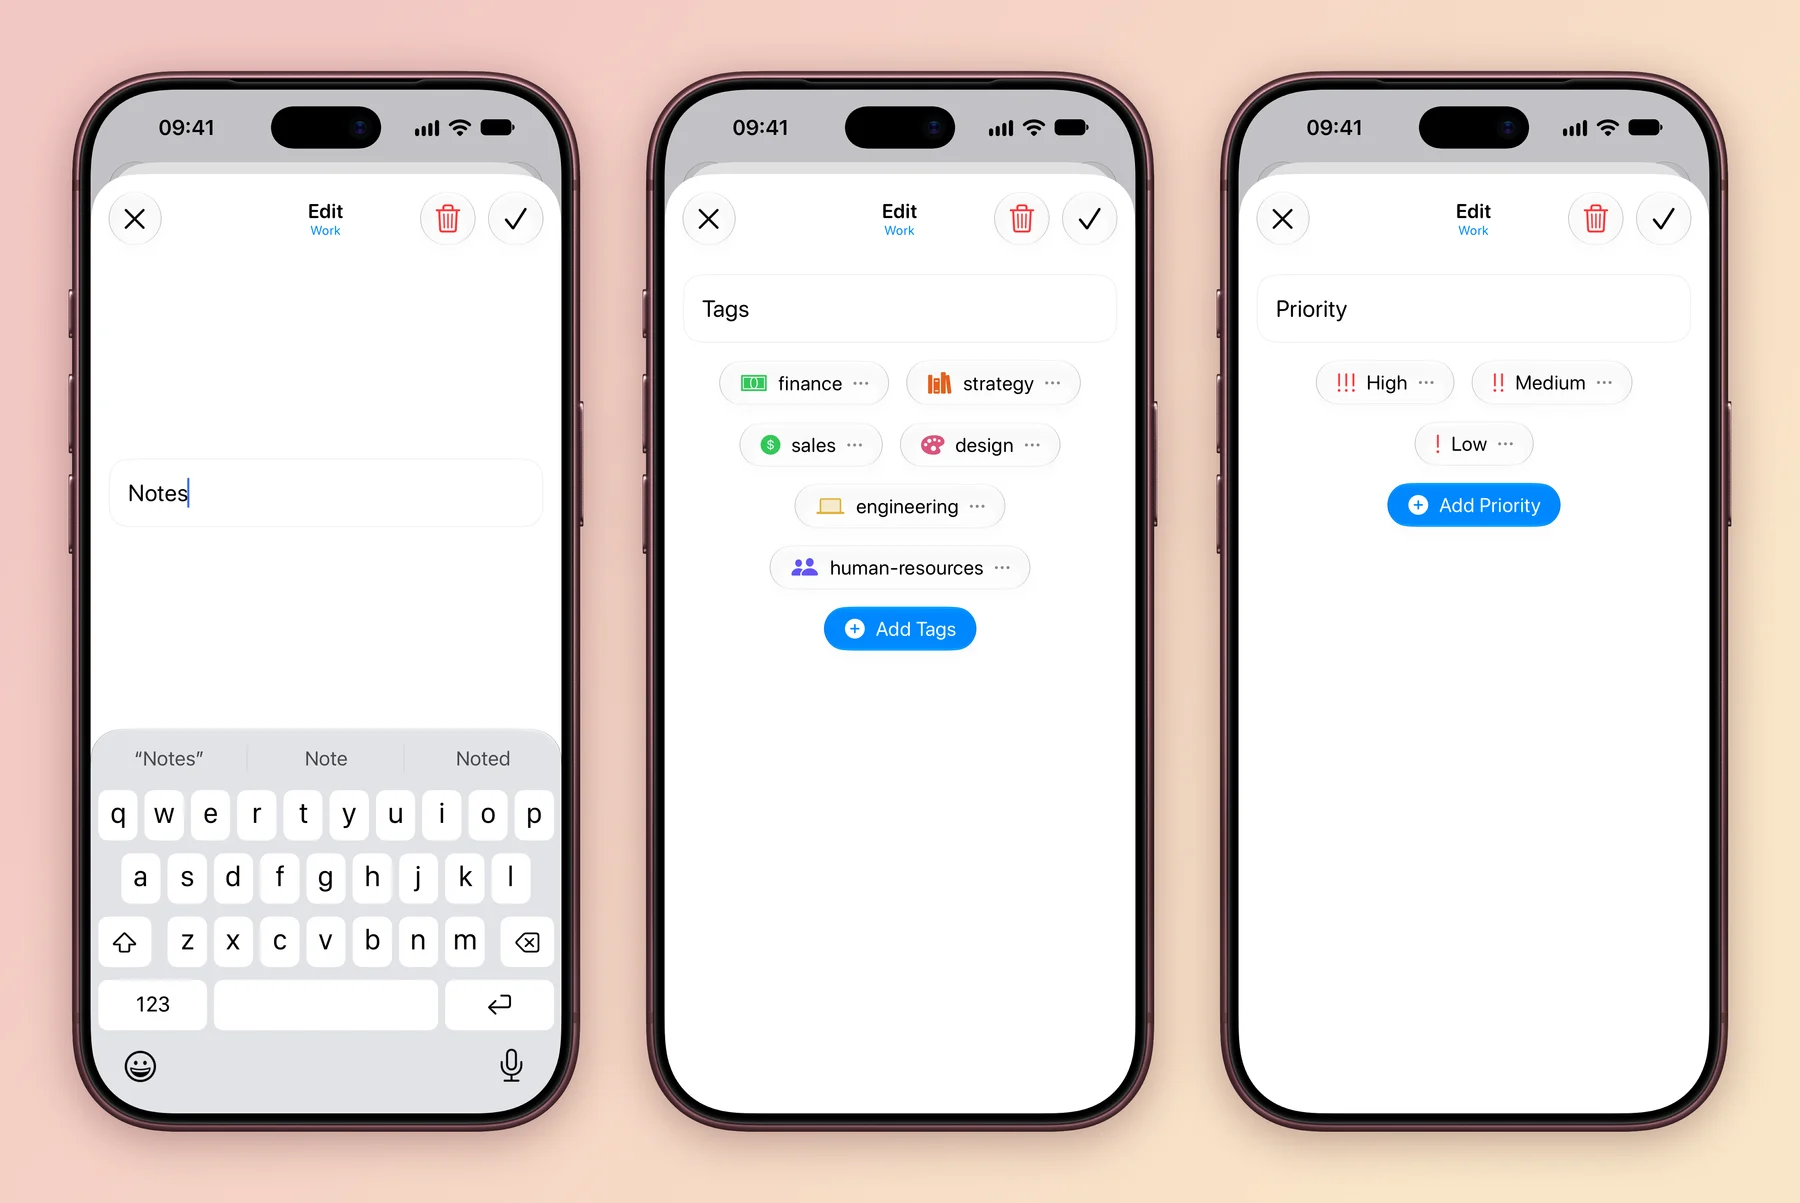
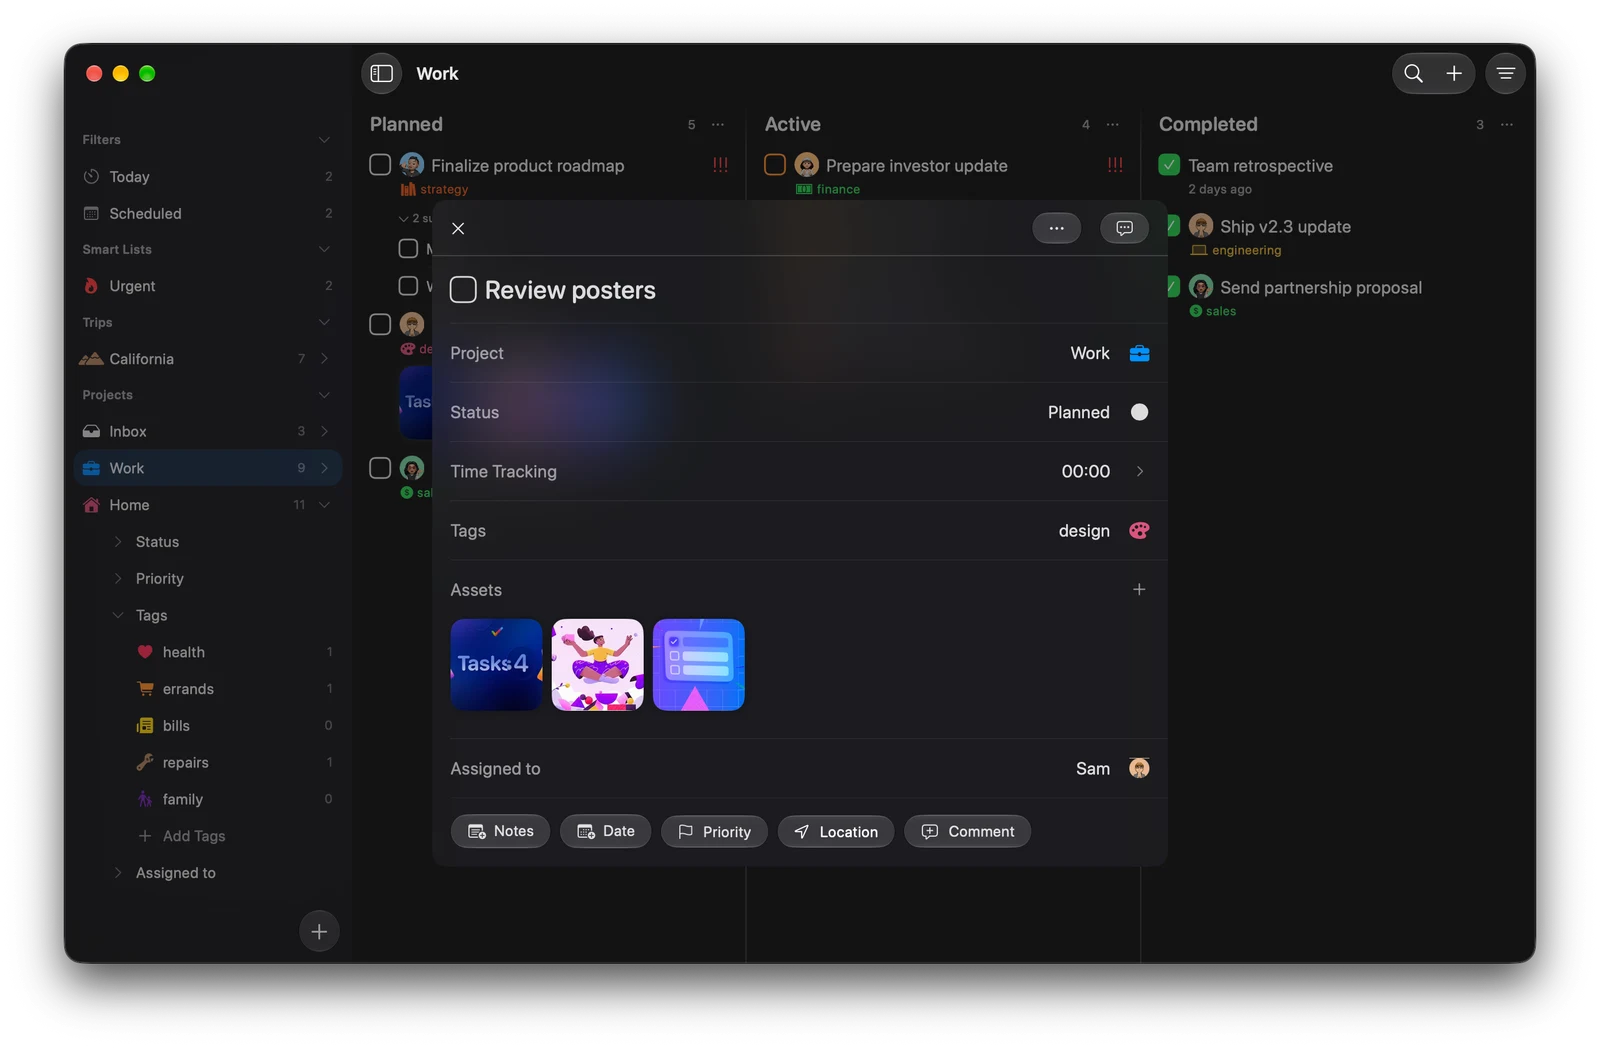
Tap one of Your fields to rename it or change its options, such as the tags or priority levels it offers. A field can take any name: the Work project calls its Attachments field Assets. The trash button removes the field. Deleting a field removes it from every task in the project, so Tasks tells you how many tasks will lose their saved values first.
Not sure which field you need? Pick one from the list below.
Fill in a task
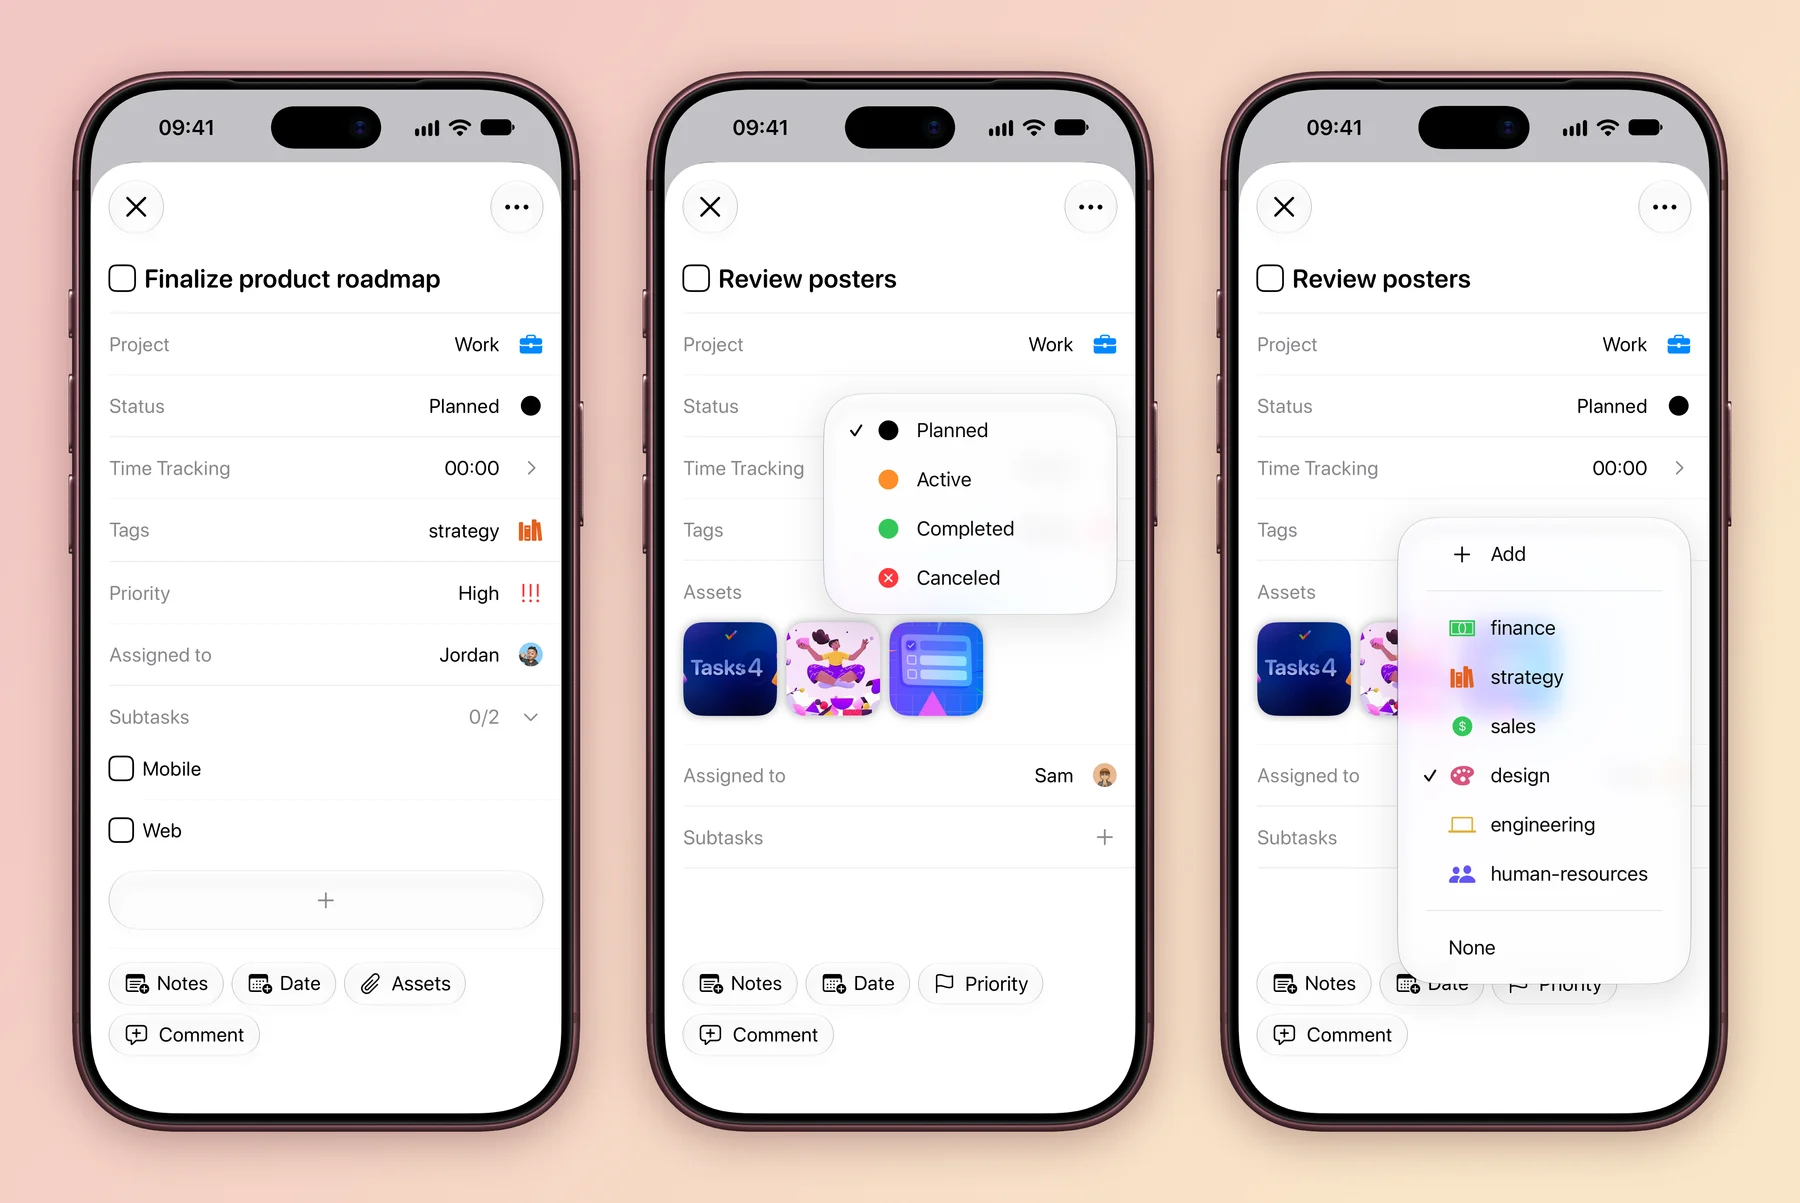
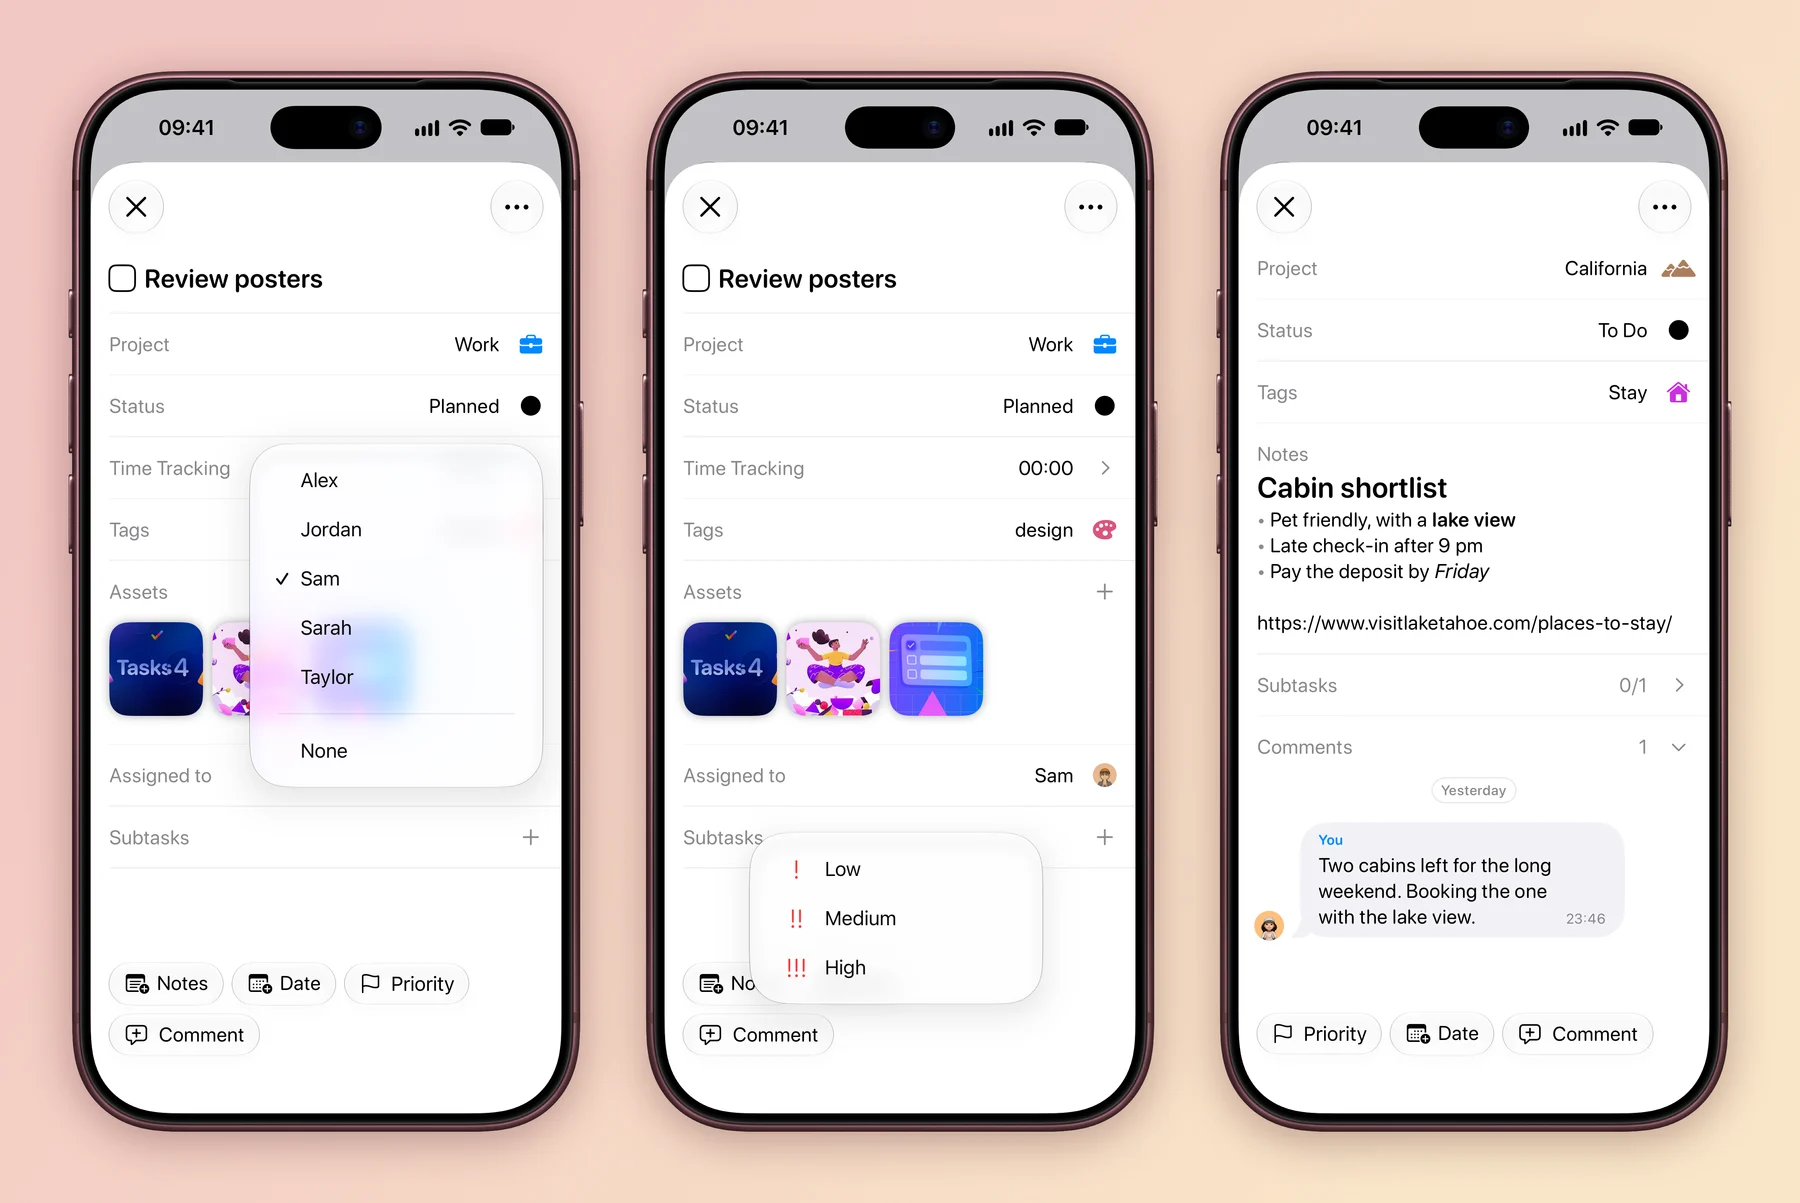
Open a task to see its fields. Fields with a value show as rows. Empty ones wait as buttons at the bottom, such as Notes, Date and Assets, so tap one to fill it in. Status, tags, people and priority open a short menu. None clears the value, and Add in the tags menu creates a new tag.
Tap Comment to leave a note for everyone on the project. Comments collect under the fields, with who wrote them and when.
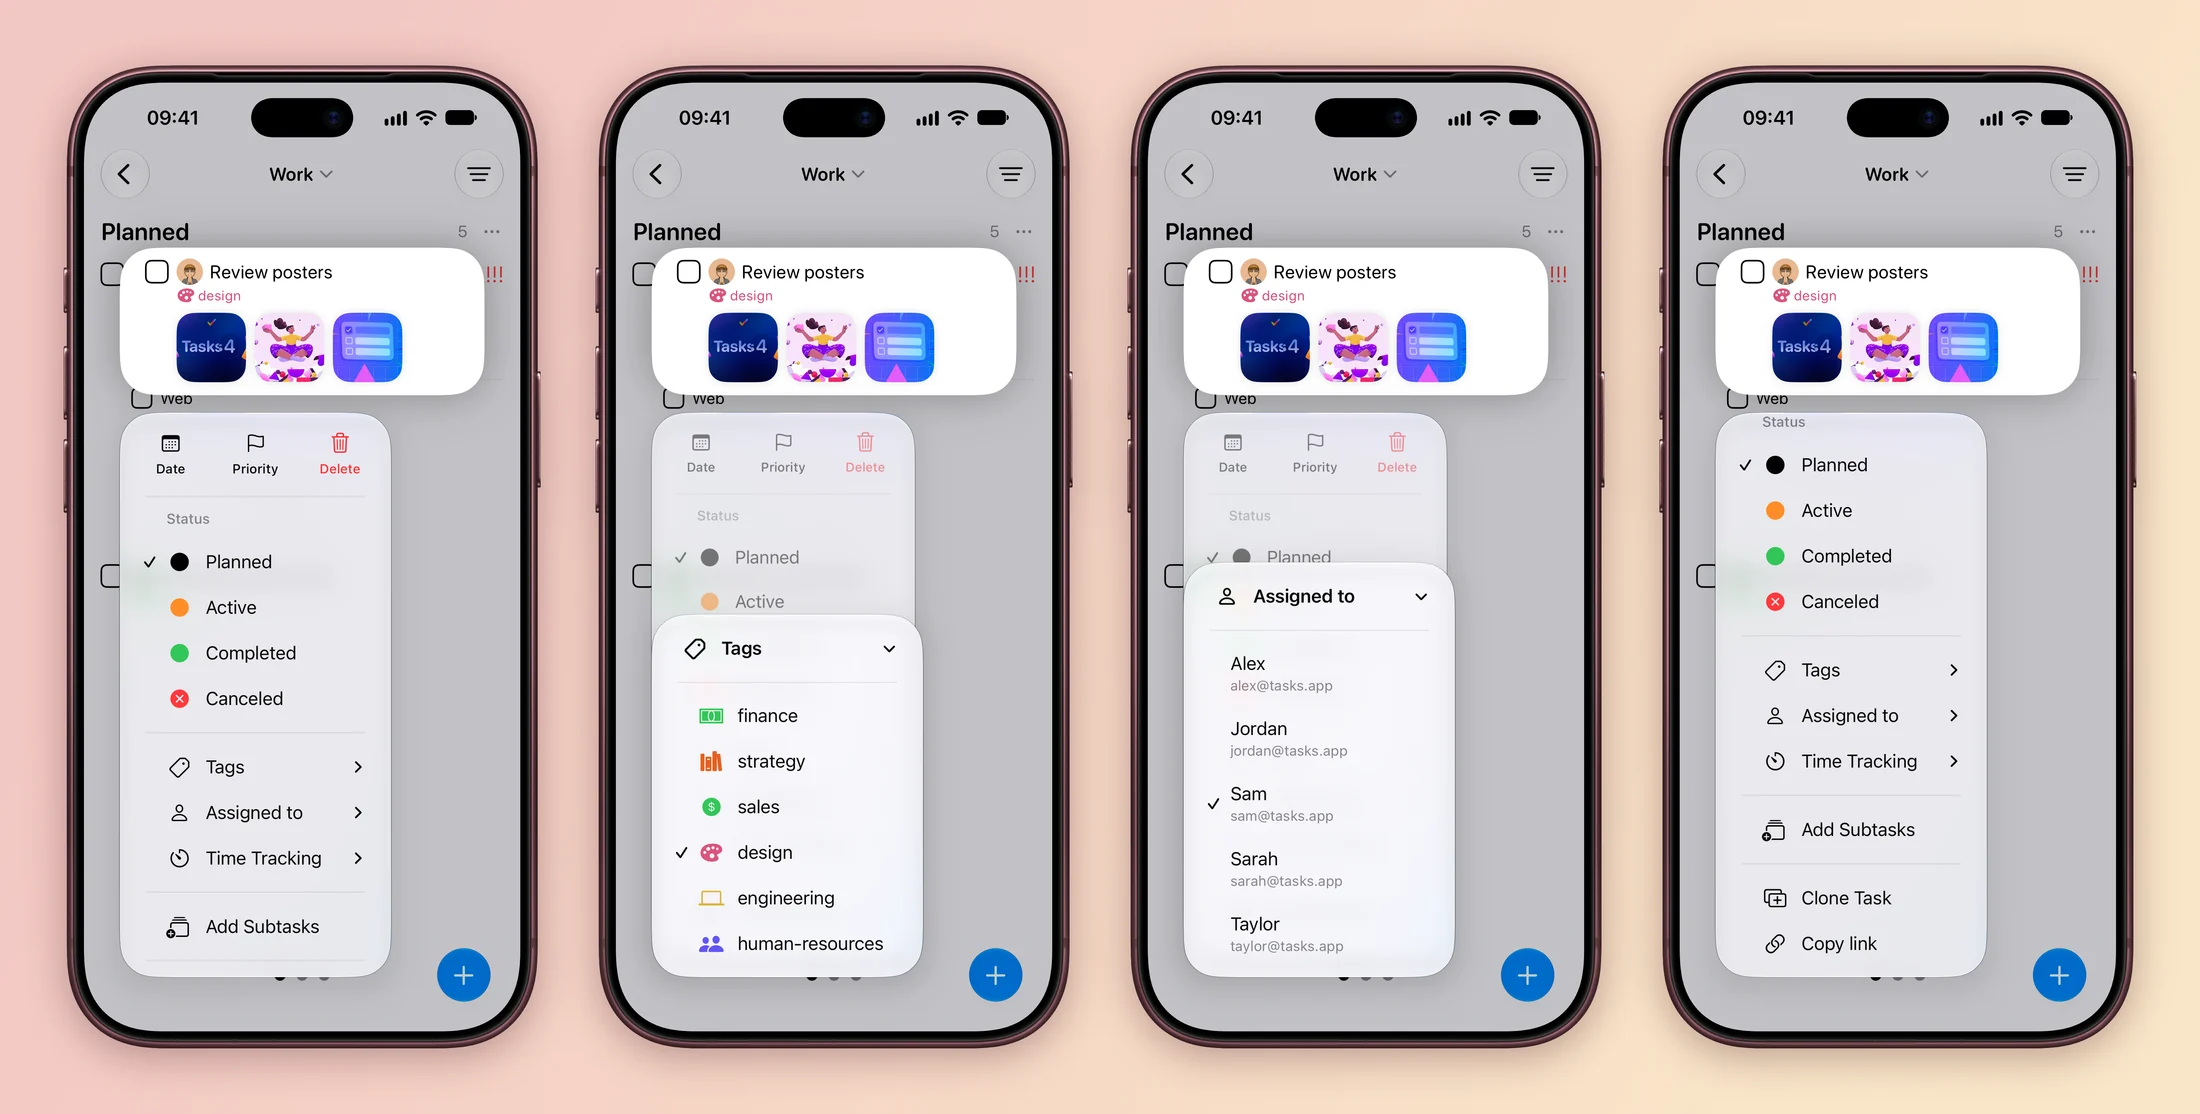
To change a task without opening it, long press it on the board. The menu has Date, Priority and Delete across the top, every status, then Tags, Assigned to and Time Tracking. Below those are Add Subtasks, Clone Task and Copy link.
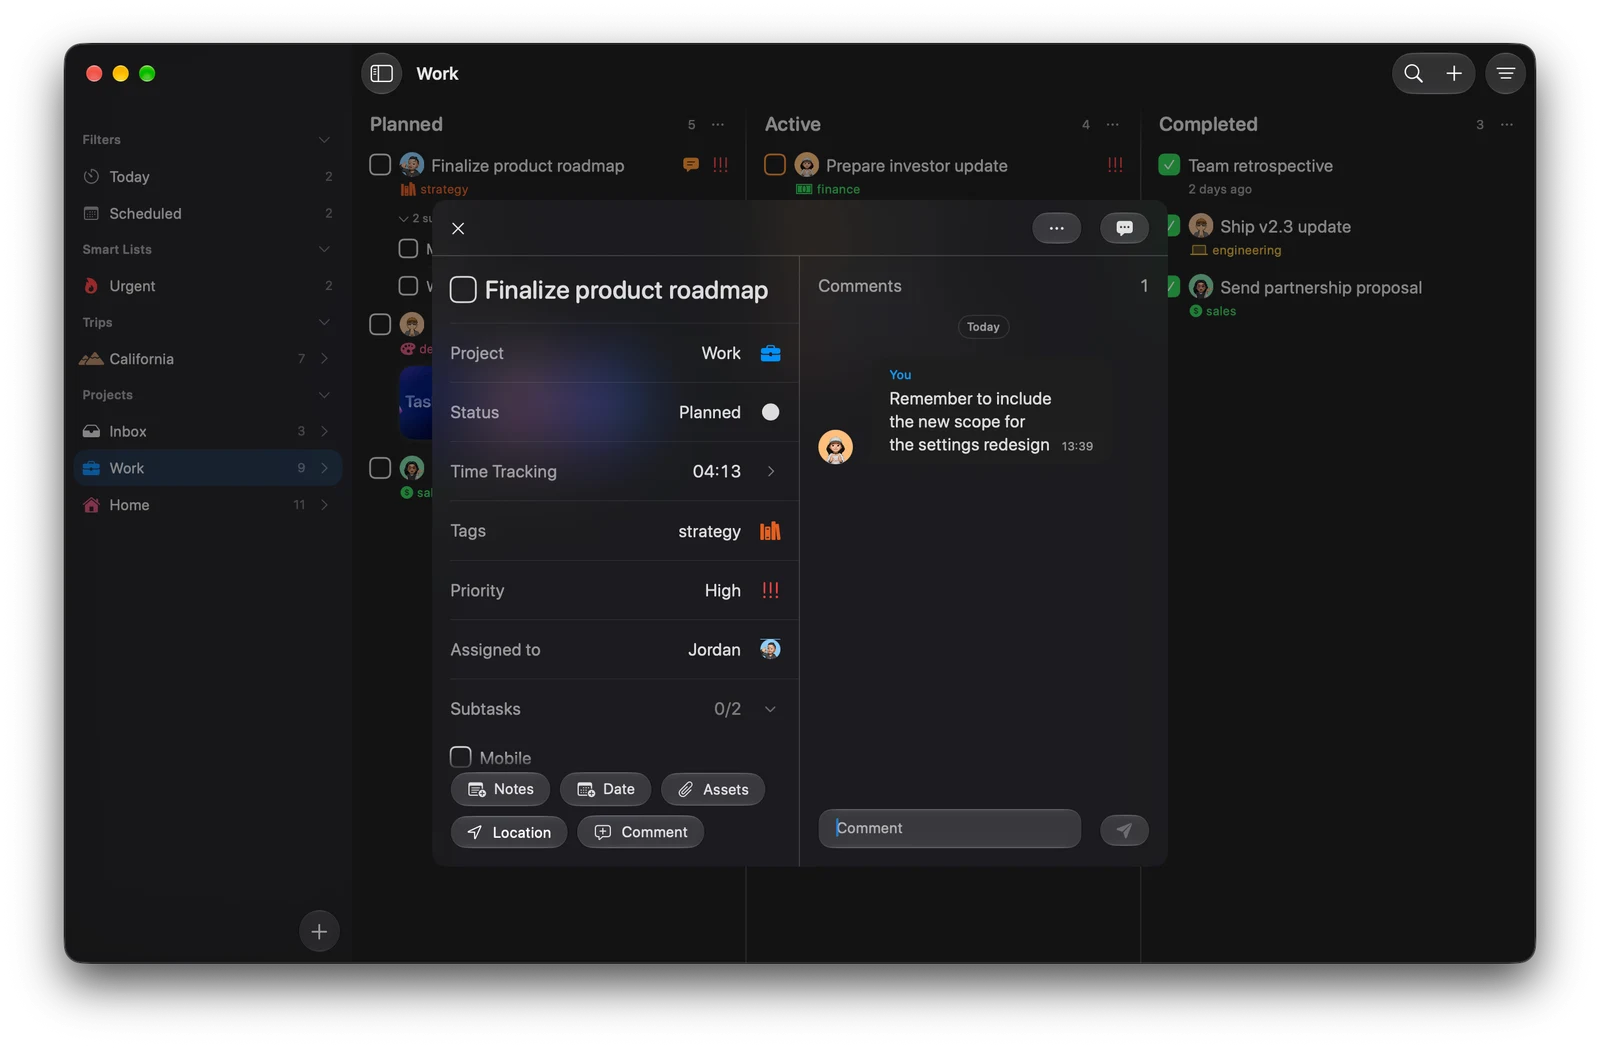
Click a task to open it in a floating panel over the board, or select it and press Return. Right click a task for the same menu as a long press. You can change most fields without opening it at all:
| Keys | Opens |
|---|---|
| ⇧⌘T | Tags |
| ⇧⌘A | Assigned to |
| ⇧⌘P | Priority |
| ⇧⌘S | Status |
| ⌘S | Date |
Pick with the arrow keys and Return. In the task panel, press ⌘Return to save, and click the Comments button to open the comments beside the task.
To see a task’s history, open its … menu and choose View Activity. It shows when the task was created and when it was last updated. The same menu has Want More Fields?, Clone Task, Copy link and Delete.
Write notes and attach files
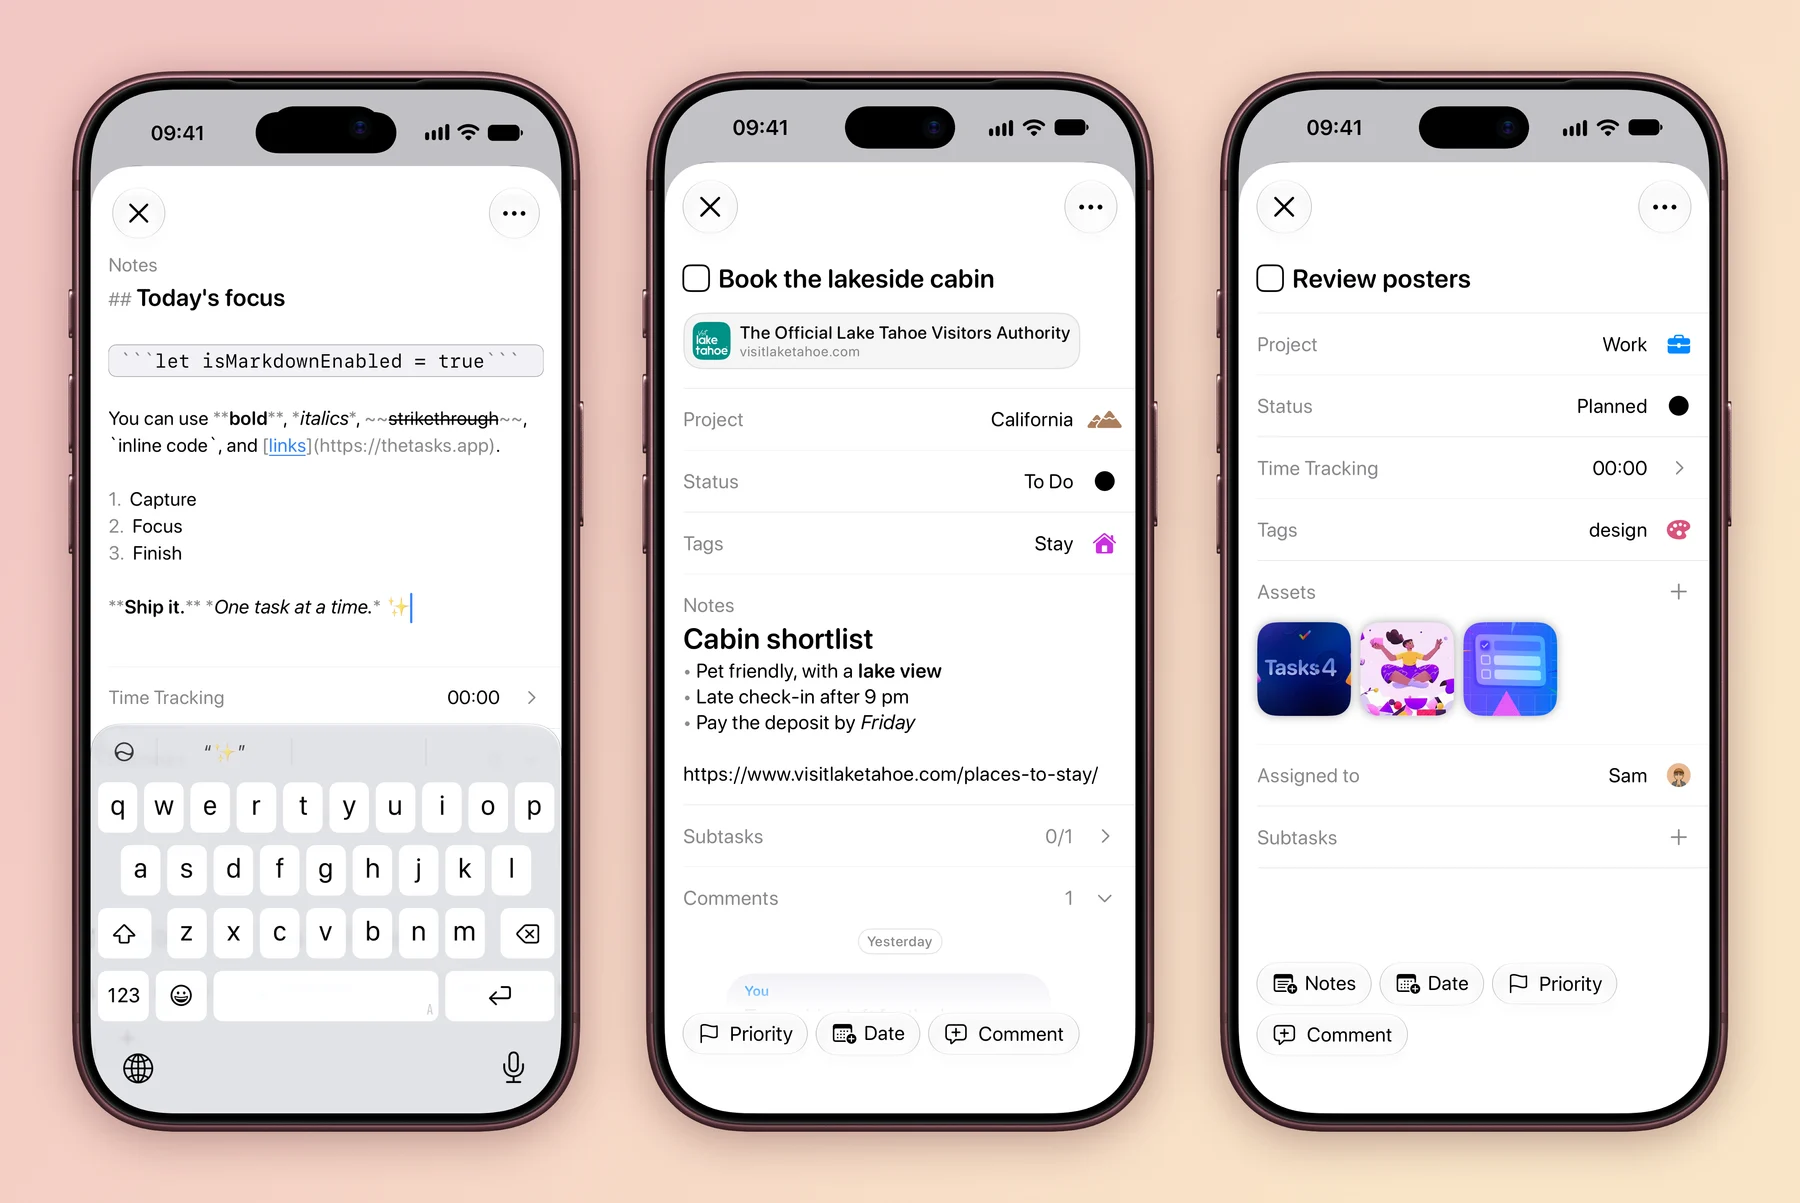
A Text field takes Markdown, so a note can hold a proper brief:
| Type | To get |
|---|---|
#, ## or ### |
A heading |
- or 1. |
A list |
> |
A quote |
**bold**, *italic* or ~~strikethrough~~ |
Emphasis |
`code` |
Monospaced text |
[links](https://thetasks.app) |
A named link |
The symbols stay visible while you type. Paste a full address and it becomes tappable, with a preview at the top of the task. Lists show a one line preview of the note, and the task itself shows the full formatting.
To attach something, tap the add button on the task’s attachments field and choose Photo Library or Choose Files. Tap an attachment to preview it.
To send a file somewhere else, open it and tap Share.
You can also drag files, or paste images and PDFs straight into the title or notes. To keep a copy, open the attachment and click Save.
Which field do I need?
Each project has its own fields, so add the field to the project you are working in. Tap it on a task to fill it in.
- Notes. Add a Text field named Notes, then tap it and type. Markdown works.
- Links. Paste the full address, including
https://, into Notes or another Text field. It becomes tappable. - Dates. Add a Date field to set a date, time, alert or repeat.
- Locations. Add a Location field, choose a place, then pick when you arrive or leave. Allow location access when asked.
- Attachments. Add an Attachments field, then choose Photo Library or Choose Files.
- Images. Open the attachments field on the task and choose Photo Library.
- PDFs. Open the attachments field on the task and choose Choose Files.
- Statuses. Every project has stages. Change them from the project menu with Edit, then Statuses.
- Priorities. Add a Priority field, then choose a level on a task.
- Task types. Add a Task Type field and create the types you use, such as Bug or Idea.
- Assignees. Add a Collaborators field, shown as Assigned to on tasks. It works in shared projects, so invite people first.
- Subtasks. Add a Subtasks field, then break a task into steps.
- Time tracking. Add a Time Tracking field, then start a timer or add time by hand.
Still missing? Check that you are in the right project, and look for a field with a different name, such as Assigned to.
Want the stages to match your work too? Choose Edit, then Statuses, as shown in Change a project later.
Explore all 19 related features
Browse the related features below for more detail, or search every feature.
Project-specific fields
Choose the details that appear in each project.
Read moreNotes
Keep supporting text and context with a task.
Links
Keep tappable web links beside the work.
Date fields
Add dates and times to tasks.
Multiple date fields
Use more than one date field when a workflow needs it.
Location fields
Attach a useful place to a task.
Multiple location fields
Keep more than one location field in a project.
File attachments
Keep files with the task they support.
Images
Add, preview, reorder and remove task images.
PDF attachments
Add and preview PDFs inside a task.
Tags
Classify work across projects with reusable labels.
Custom statuses
Define the stages that make sense for each project.
Read moreCustom completion status
Choose which project status means the task is complete.
Priorities
Mark which work needs attention first.
Task types
Create project-specific kinds of work.
Assignees
Show who owns a task in a shared project.
Field placement controls
Choose where supported fields appear during creation and in lists.
Markdown notes
Format notes with headings, lists, checklists, quotes and code.
View Activity
See when a task was created and last updated.